Difference between revisions of "Editing With ProTools"
(→Setting Up A New Pro Tools Session) |
(→Setting Up A New Pro Tools Session) |
||
| Line 17: | Line 17: | ||
[[File:Naming_table.png]] | [[File:Naming_table.png]] | ||
| − | *'''For concert and events calendars''', go to the folder in Finder under Volunteer → ProTools Documents → Concert | + | *'''For concert and events calendars''', go to the folder in Finder under Volunteer → ProTools Documents → Concert Calendar OR Events Calendar and open the .ptf file for the day of the week you are recording for. Delete the voice track and record a new one, but keep the music bed. |
*'''For underwriting, if the contract # and client already exists''', click “Cancel” and follow the directions for “How to Open an Existing Pro Tools session,” as there are sometimes multiple scripts under the same contract (with separate tracks for each script in the same .ptf). | *'''For underwriting, if the contract # and client already exists''', click “Cancel” and follow the directions for “How to Open an Existing Pro Tools session,” as there are sometimes multiple scripts under the same contract (with separate tracks for each script in the same .ptf). | ||
Revision as of 17:26, 5 November 2013
For information on recording see the Recording Basics page. To edit with ProTools you will need to be familiar with Icons and Tools. It may be helpful to keep this page and Icons and Tools open for reference.
Contents
Getting Started
Open Pro Tools LE by clicking the icon on the dock (Pro Tools LE).
Setting Up A New Pro Tools Session
- Go to the Pro Tools menu bar at the top of the screen and click on File → New Session
- Choose the appropriate destination folder within “ProTools Documents.”
- Generally, sessions should be named according to topic, guest and date. See the table below for other standard naming conventions.
- For concert and events calendars, go to the folder in Finder under Volunteer → ProTools Documents → Concert Calendar OR Events Calendar and open the .ptf file for the day of the week you are recording for. Delete the voice track and record a new one, but keep the music bed.
- For underwriting, if the contract # and client already exists, click “Cancel” and follow the directions for “How to Open an Existing Pro Tools session,” as there are sometimes multiple scripts under the same contract (with separate tracks for each script in the same .ptf).
The session parameters should be the following:
- Click "Save"
Opening an Existing Pro Tools Session
- Go to the Pro Tools taskbar and click on File → Open Session
- Locate the existing session, open the outer folder, locate the .ptf, select it.
- Click “Open.”
Playback and Timeline Adjustments
- To set a point you want playback to begin, you can click on the time you’d like it to start on the ruler. You will then see the playhead jump to that position.
- To start or stop playback at anytime, just press the spacebar.
- You can also jump the playhead back to the very beginning of your session by pressing the return key on the keyboard or using the left arrow key in the transport bar.
- If you want to hear only a specific selection of your audio, you can click and drag on the ruler to set start and stop points or highlight the section using the SELECTOR tool. When you start playback, it will only play your highlighted selection.
Track and Regions Menu
Tracks List
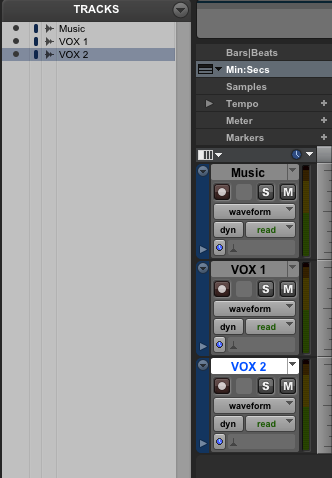
While looking at the edit window, look to the far left of the screen. This is where the track list is located. If you cannot see it, look for a button on the bottom left corner that has an arrow pointing to the right. After clicking that arrow, your window should look like this:
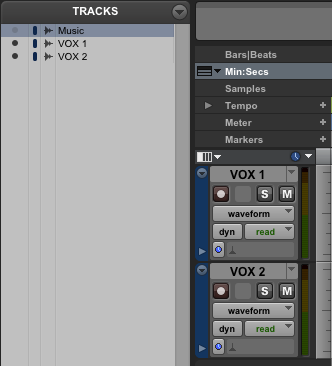
In the track list you see the names of all of the tracks that are in the project. Each track has a dark gray dot on the leftmost side of the track list. If you don't need a track to be visible for the moment, click that dot so it turns to a light gray. That track becomes hidden and disappears from the edit window:
NOTE: Even if you have a track hidden, you will still hear it unless you mute it!
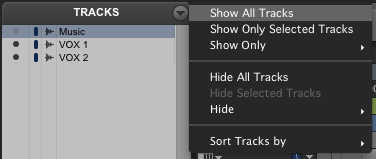
You can also manage your tracks by clicking on the arrow next to the word “TRACKS” for more options:
Regions List
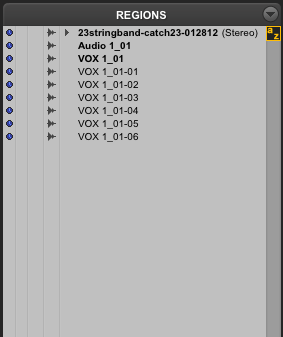
- The regions list is located in the edit window to the far right. If you cannot see it, look for a button in the bottom right that has an arrow pointing to the right. After clicking that arrow, your window should look something like this:
- The purpose of the region list is to show you all of the clips of audio which are contained within that project. The names of the regions are dependent upon what the track was named before they were recorded, or what they were named before they were imported. New regions are made every time a change is made, but you will not lose the original version.
- In this picture, there are several regions that are named “VOX 1_01” and have another number after that. In this case the region “VOX 1_01” is the original region and the others (VOX 1_01-01, VOX 1_01-02, VOX 1_01-03, etc.) are different versions of the original file. For example, if one recorded their voice onto a track named “VOX 1” the region would be called “VOX 1_01”. Now if one then proceeded to cut that recording into two separate sections, the result would be two regions with the names “VOX 1_01-01” and “VOX 1_01-02”, but the original recording, “VOX 1_01”, would still be in the region list.
- Anytime you need to use a region that is not currently on a track, just click and drag it from the regions list to the desired spot in the track.
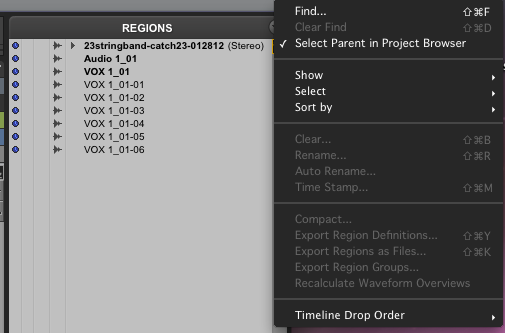
- Next lets look at the regions menu. You can pull this up by clicking on the arrow next to the word “Regions” as seen below:
- From this menu we can sort, hide or show, rename, clear, and export regions. The most important for the purposes of KDHX is exporting.
Exporting is a quicker way of getting the files you need in a format which you can then burn to a disc. The alternative is a Bouncing to Disk, which is real time so you have to listen to the entire piece.
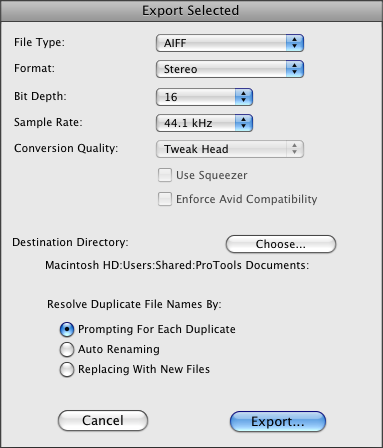
NOTE: If you have several tracks that need to be summed together, this method will not work. In such cases bounce to disk is the appropriate method. In order to export files, first select them by clicking on the name in the region list (for multiple files, hold down the command key while clicking) and select “Export Regions as Files...”. Now a window will come up. Make sure that the settings are as follows:
- Use the "Choose" button to select the proper destination for your files. Then click Export, and you're done.
Editing with Ambiance/Room Tone
- Put the project in "SHUFFLE" mode.
- Double-click the "ZOOM" tool to see the full view of all content.
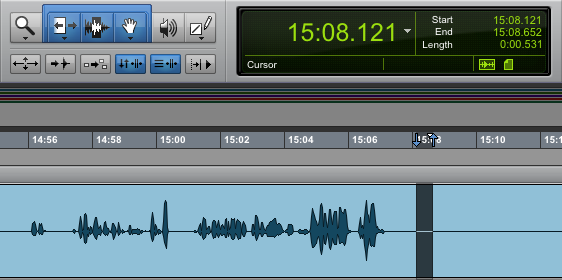
- Using the "SELECT" tool, highlight approximately .5 seconds of silence from the end of your track. You can check the length of the highlighted material by looking at the "length" at the top of the screen. Hit the space bar to play back the highlighted material. Listen to make sure that it is clear silence free of any voice and contains the least amount of background noise, as it is what you will use to paste over breaths and other unwanted sound throughout your recorded track. After you have verified this, hit apple+C on the keyboard to copy the silence.
NOTE: .5 seconds is the approximate length of a period, while .25 seconds is the approximate length of a comma. However, these will differ depending on the pace of speech.
- Use the “ZOOM” tool to click and drag around the back end of your track. Now, using the “TRIM” tool, crop off any extraneous material. Note that any material that is cropped or deleted appears to the right under the “Regions” menu on the right. You can click and drag any portion to bring the waveform back into the track.
- Double-click the “ZOOM” tool to return to full view and repeat the above step to the front end of your track.
- Click on the “BACK TO THE BEGINNING” button to set the playback point to the beginning of the track. Hit the space bar and begin listening carefully for mistakes and things such as breaths, the sound of paper ruffling or chair squeaking and popping p’s.
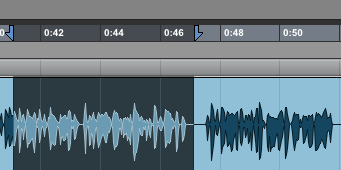
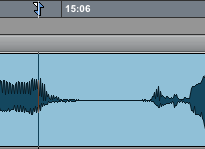
- When you encounter one of these mistakes, hit the space bar to stop the recording. Using the “ZOOM” tool, click and drag around the problem area for a closer view. Set the playback marker (the blue diamond) a few seconds behind the mistake by clicking above and behind in the timeline.
Related Articles: Markers
- Once the problem has been pinpointed, use the “INSERTION” tool to highlight said problem (in this case, a breath). Hit the space bar to listen to the selected area.
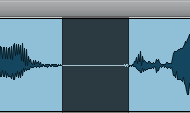
- Then, hit apple+V to paste the silence over the area.
- If the silence is meant to be a period, leave the length as is. If it is meant to be a comma, click in the middle of the section with the “TRIM” tool to crop the silence in half. At any point, you can bring back material that has been pasted over by clicking and dragging out the ends of sections with the “TRIM” tool.
- Hit the space bar to continue listening and editing in this manner until all mistakes have been edited out.
Related Pages
- Don't forget the Icons and Tools page!
- This page contains Helpful Editing Tools and Tricks
- See also Audio Editing Exercises if you'd like to get some practice.
Finishing Up
When you are satisfied with your piece you will need to get it out of ProTools. This will involve Bouncing to Disk or Consolidating Tracks and Exporting Files.
