Difference between revisions of "Recording: Using Audio HiJack"
From KDHX Production
(→Starting the application) |
|||
| Line 5: | Line 5: | ||
===Starting the application=== | ===Starting the application=== | ||
| − | : | + | :A. Begin by starting the software called Audio HiJack, located at the menu bar at the bottom (also in the Mac's "Applications" folder). |
::[[File:opening.jpg|600px]] | ::[[File:opening.jpg|600px]] | ||
| Line 14: | Line 14: | ||
===File naming and settings=== | ===File naming and settings=== | ||
| − | : | + | :B. Check settings before you record, and NAME YOUR FILE something useful |
| + | ::1. Click on the "Recorder" square | ||
| + | ::2. edit filename, and save to location - best to use "Desktop" | ||
| + | ::3. verify setting, | ||
::[[File:2hijack.jpg|900px]] | ::[[File:2hijack.jpg|900px]] | ||
| − | |||
| − | |||
::'''Recording settings''' | ::'''Recording settings''' | ||
| Line 28: | Line 29: | ||
===Recording=== | ===Recording=== | ||
| − | : | + | :C. Click '''Record''' to begin recording. The button will become a dark grey color, indicating that it is recording. |
:75 Click '''Record''' again to stop recording. The new audio file will automatically save to the location set in '''Save recordings to:'''. | :75 Click '''Record''' again to stop recording. The new audio file will automatically save to the location set in '''Save recordings to:'''. | ||
Revision as of 17:50, 14 April 2016
Contents
How to Create a WideOrbit-ready recording with Audio HiJack Software
(you may also view this video tutorial: Recording using Audio Hijack (click here))
Starting the application
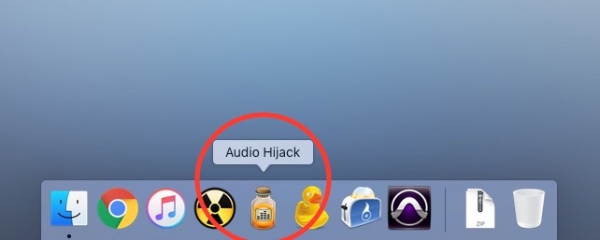
- A. Begin by starting the software called Audio HiJack, located at the menu bar at the bottom (also in the Mac's "Applications" folder).
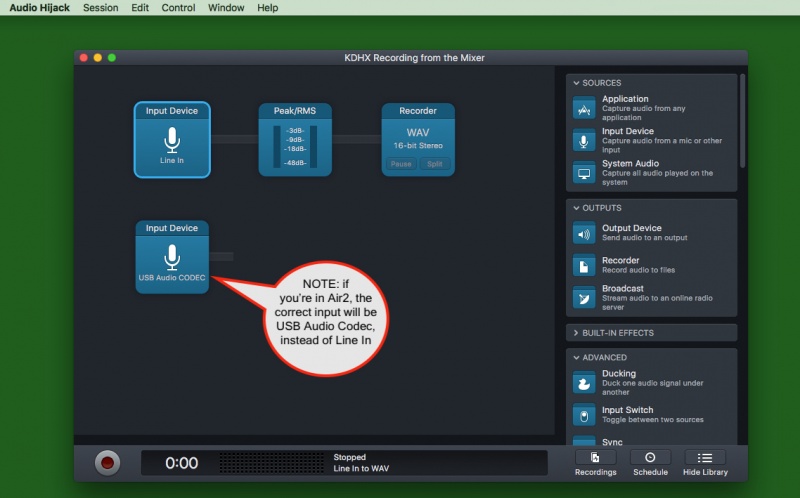
Yes, the updated version 3.0 looks way different, but is also easy to use - look for this screen, and avoid the recordings, schedule and show library windows
File naming and settings
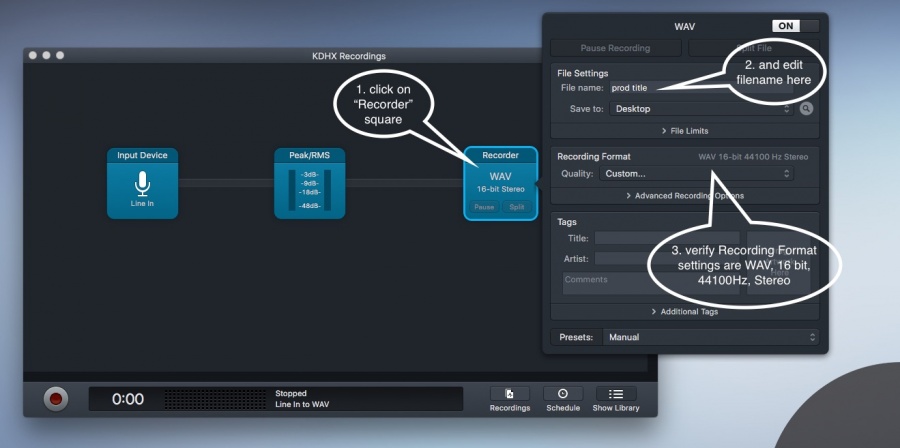
- B. Check settings before you record, and NAME YOUR FILE something useful
- 1. Click on the "Recorder" square
- 2. edit filename, and save to location - best to use "Desktop"
- 3. verify setting,
- Recording settings
- - Format: Custom, WAV, 16-bit, Stereo
- - Save recordings to: ~/Desktop - use the Select button to choose.
- - Name recordings with: your production title, e.g. "Wax Lyrical pre-record"
- - Cool feature: if you leave &date in place, the current date will be included in the filename. Similarly, %time will label the file with the recording start time. These labels can be very helpful later.
- Recording settings
Recording
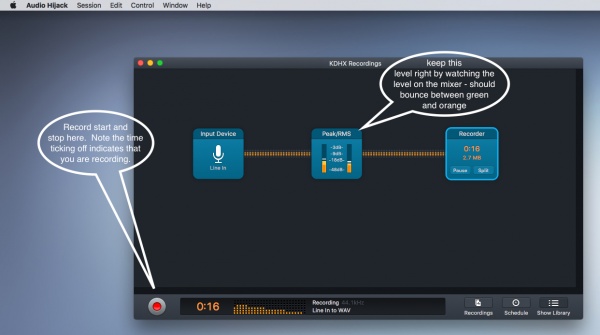
- C. Click Record to begin recording. The button will become a dark grey color, indicating that it is recording.
- 75 Click Record again to stop recording. The new audio file will automatically save to the location set in Save recordings to:.
- 8. Click Pause to temporarily stop recording, and release pause to continue with the same recording.
- 9. Click Split to immediately save the file where you are at, and simultaneously begin a new recording.
Editing your new Recording
Sound files that are recorded in Audio HiJack are easily edited and converted to other file formats using the companion software Fission (click for instructions.


